
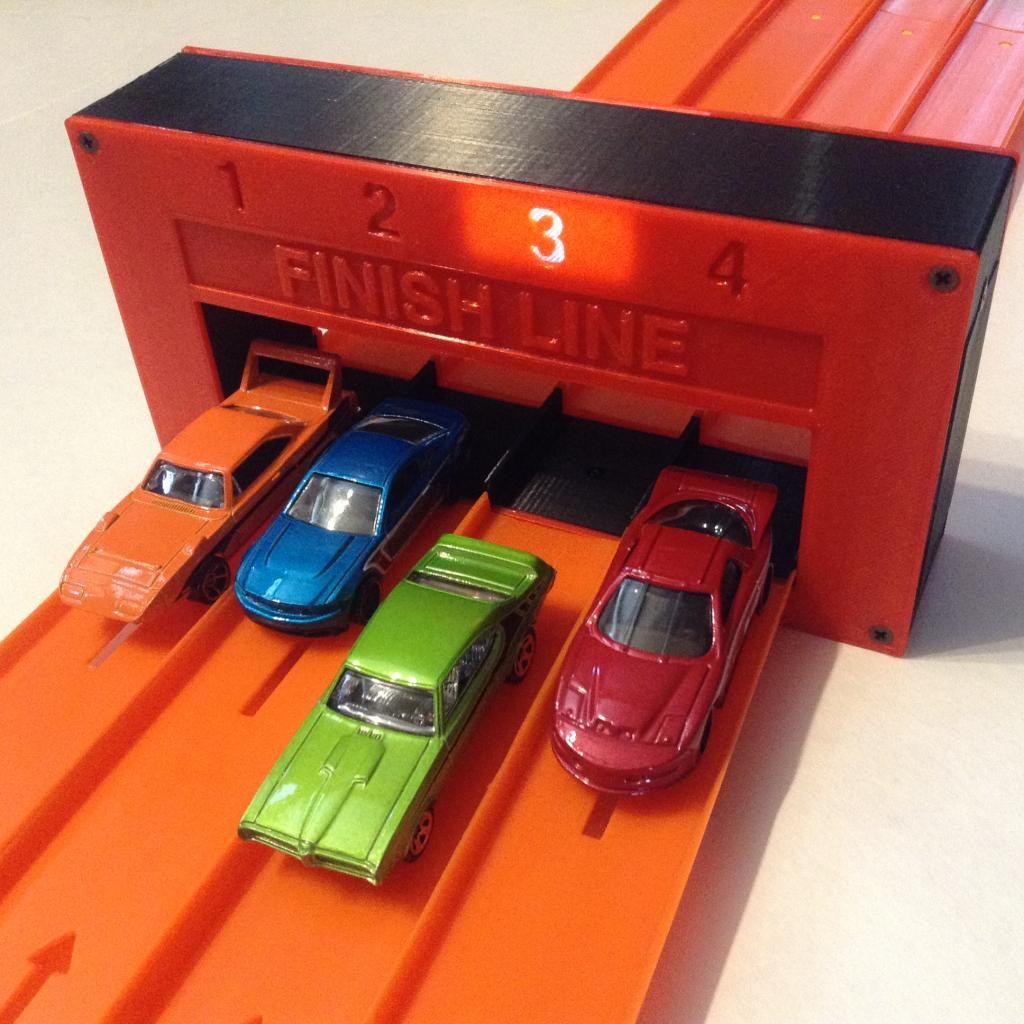
4 Lane Electronic Arduino Finish Line w/ components & code
I've been making and selling my own Hot Wheels race track components for about a year now. I got started by simply making tracks parts by hand to play with my 4 year old son, and then started manufacturing items using a 3D printer.
This is a project I completed last year and wanted to share the components and Arduino code I used to create it. The electronic design and code is based on TedMeyers' instructables post: http://www.instructables.com/id/Arduino-Controlled-Finish-Line/ but I modified some of the components and code to work for 4 lanes. I sourced all the components on eBay.
Components:
- (4) Infrared IR LED (IR Emitter Detector Pair)
- (4) LEDs
- (4) 100 Ohm resistors (For the LED lights)
- (4) 180 Ohm Resistors (For the IR Emitters)
- (4) 220k Ohm Resistors (For the IR Detectors)
- Arduino* (I use a Uno)
*Instead of running the Finish Gate directly from my Arduino, I used the Arduino to program a Attiny84 microprocessor chip, which I mounted onto a PCB, powered by a 3 AAA battery pack. If you do this, you'll need to change the Pin numbers in the code to match the chip.
Arduino Code:
// 4 Lane Finish Gate
const int ledPin1 = 13;
const int ledPin2 = 12;
const int ledPin3 = 11;
const int ledPin4 = 10;
const int sensorPin1 = 2;
const int sensorPin2 = 3;
const int sensorPin3 = 4;
const int sensorPin4 = 5;
const int TIMEOUT = 4000; // milliseconds 4 seconds
void setup(){
pinMode(sensorPin1, INPUT);
pinMode(sensorPin2, INPUT);
pinMode(sensorPin3, INPUT);
pinMode(sensorPin4, INPUT);
pinMode(ledPin1, OUTPUT);
pinMode(ledPin2, OUTPUT);
pinMode(ledPin3, OUTPUT);
pinMode(ledPin4, OUTPUT);
}
void loop() {
// Get the Sensor status
int status1 = digitalRead(sensorPin1);
int status2 = digitalRead(sensorPin2);
int status3 = digitalRead(sensorPin3);
int status4 = digitalRead(sensorPin4);
// Set the output LED to match the sensor status
digitalWrite(ledPin1, status1);
digitalWrite(ledPin2, status2);
digitalWrite(ledPin3, status3);
digitalWrite(ledPin4, status4);
if (status1 == HIGH || status2 == HIGH || status3 == HIGH || status4 == HIGH) {
// A sensor was tripped, show the results until timeout
delay(TIMEOUT); // Wait for timeout
}
}
For how to connect everything you can refer to the instructables post. The only difference is you'll be connecting 2 more IR detectors to PIN 4 & 5, and 2 more LEDs to PIN 10 & 11.
The end result was very accurate. The winning lane stays lit for 4 seconds and then resets automatically. You can adjust the time in the code if you like. (const int TIMEOUT = 4000; // milliseconds 4 seconds)
I only made one of these and sold it a while back to a happy customer. Then I had some issues with my 3D printer and got busy making other items. I do plan on making them again soon and will be selling them at www.3Dbotmaker.com
Discussion
Welcome to Redline Derby and thanks for sharing...I'm very interested in 3D printing, almost bought one for myself this Christmas. Your finish line looks awesome! And is exactly why I want to learn. I tried to make an Arduino-based finish line a couple years ago and it didn't work too bad, but it got stuck in breadboard land and had to move on to other projects.
Thanks for sharing your code. If I ever get out the Arduino again, I'll give it a shot. I only have enough stuff for 2-lanes but I found the programming stuff pretty straight forward; it was the wiring and structure that I had difficulty with.
If you ever get around to printing finish lines again like the one in the photo, I would be *very* interested in buying one, and I think a lot of people here would too. Even if you sold it as a kit, it would be sweet. And to be honest, since I already have the Arudino and parts, I'd love to buy just the plastic printed parts for the housing.
Again, welcome to the site. I think you'll find your skills for creating accessories for Hot Wheels will go far here, and could yield you some extra cash too :)
Thanks for the compliments. I should have the finish line available in about a month. I want to make a few improvements to the internal structure of my design to make mounting the components easier. Selling the plastic housing is definitely something I'm interested in. If anyone tries wiring up an Arduino finish line like this and runs into problems let me know and I can help you troubleshoot.
What is the clearance height for your finish line?
The picture looks like a decent height but wondering about taller trucks and more so customs. Any idea how much that clearance height could be extended before the sensors fail to work?
- Current height clearance is 41mm. I'm planning on increasing that to around 45mm. That would be enough room for a Highway Hauler truck. — 3DBotMaker
- drag tracks is about 1.30 so that is what we use as a minimum... — model40fan
Any suggestions on the minimum height clearance? I'm currently making some changes to the design and would appreciate any suggestions. I want to keep it compact, but allow it to work with as many cars & trucks as possible. The HW Highway Hauler 2 is the tallest vehicle I have so I've been using that as a baseline.
I'd say go as tall as you can to the point where the sensors stop working...because don't they crap out after a certain height? But I agree that the line should be compact and handy - and not look too stupid :)
Maybe 2-inch clearance? The tallest races we've run here were actually "hauler" races where a truck had a car on its back, and the playset 1.3" gate caused some concerns...but also created half the challenge in the build. Even for that type of theme build, 2-inches should be plenty.
Cool! And welcome! I'm sure you'll find some interested people here!
Good luck!