
Make your own power adapter for 3DBotMaker finish line
Late last year my 3DBotMaker finish line had a failure. The batteries that were installed leaked (or whatever) and ruined the battery pack. My first thought was to just replace the battery pack but after Chris mentioned he rigged his up with a plug, I did some research and found these directions on Instructables and decided I'd give it a shot.

I am NOT an electrical person at all. I feared this would require some soldering and other things I'm not skilled at, but it turns out you don't need much skill at all.
All you need is...
- 1 x USB-to-microUSB charger cord. You can find these at the dollar store if you don't have one lying around already. Price usually varies based on length.
- 1 x USB outlet adapter. You're probably using one for your smartphone. Use it or you can find one for sale almost anywhere for pretty cheap (Walmart, Odd Lots, etc)
- 1 x 3DBotMaker finish line
- A hobby knife (or wire stripper if you're fancy)
- Hot glue gun
- Electrical tape or duct tape
Step 1 - Take it all apart
The 3DBotMaker finish line comes apart pretty easily. Just unscrew the face plates and then unscrew the battery pack.
Step 2 - Cut the battery pack wires
Cut them as close to the pack as you can so you have plenty of wire to strip. Use your hobby knife to strip away the plastic insulation, exposing the wire. Give yourself plenty of bare wire.
Step 3 - Strip the USB charger cable
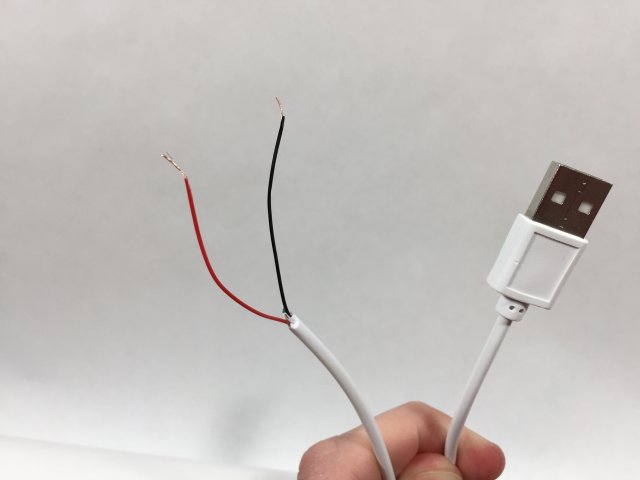
Cut off the MicroUSB end of the charger cable and strip away the outer plastic. There will be 4 wires inside; red, black, green and white. You only need red and black. Cut off the green and white ones so they don't get in the way. Then strip the red and black wires so you expose them as well. Give yourself a good amount to work with.
Step 4 - Put a hole in the door

Take the door that covered the battery pack and drill a little hole for the charger cable to go through. Thread everything through the hole. Make sure you do this before you start splicing wires otherwise your cords will be dangling where you don't want them.
Step 5 - Twist the wires together & test

Twist together the red wire from the cable and the red wire from the finish line. Do the same for the black wires. Then, making sure your red and black wires are no where near touching, go ahead and plug in your cable for a test. The finish line should boot up and work normally.
Step 6 - Hot glue the twists

Assuming your test run worked, take some hot glue and cover each of the twisted wire pairs. This will help them stick together and give them a little insulation. After the glue cooled, I took some tape and wrapped each one just to be safe.
Step 7 - Tape down the wires

I taped down the wires to the finish line frame inside where the battery pack was. I made sure to pull the charger cable in a bit so there is some slack, so in the case the cord gets yanked it won't rip apart.
Step 8 - Reassemble and race
Screw everything back together and enjoy your wall-powered finish line. Never worry about batteries again!
I was quite surprised how easy this was and also how cheap it really is. All I spent was $1.00 for the charger cable. Everything else I had on hand. I'm usually pretty timid when it comes to dealing with electricity, especially when it comes from an outlet but this worked incredibly well.
This process should work for the 4-lane and 2-lane finish lines that 3DBotMaker has for sale. And honestly, this type of modification should work almost anything that runs off of AAA and AA batteries (up to a certain amount).
Discussion
The latest version of the 3DBotMaker Finish Line now includes a micro USB port and a power on indicator light. 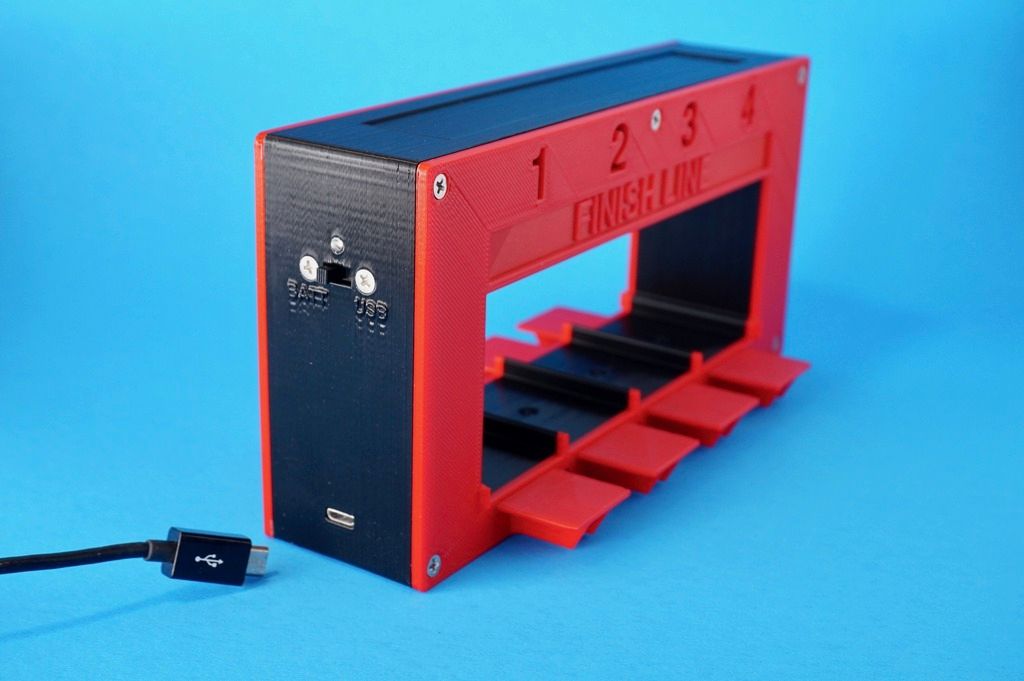
Nice...a welcomed feature, although that kind of takes the DIY fun out of it! ;P
This is a really handy tech-tip. Sometimes the obvious is overwhelming....but you made it simple, thanks!