Angel's Crest Highway


Details
- Style: Road course
- Total length: 65 ft.
- Lanes: 2
- Built by: transportdiecastracing
About
The Inaugural Tournament has begun, Rounds 1 and 2 can be found on YouTube.
https://www.youtube.com/channel/UCkSz6rsGmjTqdrF9ZSrbsIg
Join the Facebook group to get in on the races!
https://www.facebook.com/groups/852564151933379/?ref=group_header
It all started with a headline about someone building a track for toy cars and filming with ridiculously high production values. I clicked on the link and started watching... Then I watched more... and more... I spent the rest of the night watching 3DBotmaker's videos on YouTube. I went out to buy a sheet of coroplast the next day and fell down the rabbit hole.
I drew my inspiration from 3D's DRC track. That series appealed to me the most, but I was a little unhappy with the length of the track. I wanted to hold on to that excitement longer! So I decided that no matter what my design was, my track was going to be long!
I did tons of experimenting with coroplast but eventually decided that retail tracks would give me cleaner and more consistent runs. I started by adding a Crash Racers set and a MaxTraxxx set. I eventually added an Augmoto set and then a second Crash Racers set. The rest of the track pieces are custom 3D printed.
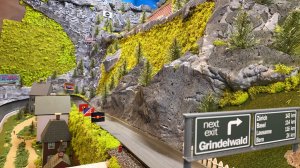
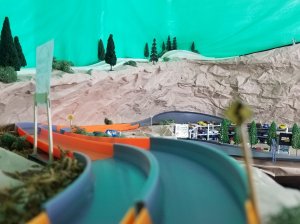
The scenery is a work in progress, I was SO lost when I started so I did just enough to make it presentable. I will be putting more focus on this soon.
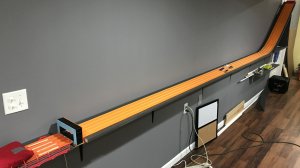
The track framing consists of wall brackets, plywood, some 2x3s, and cardboard.
Here is a small summary of the track and its traits:
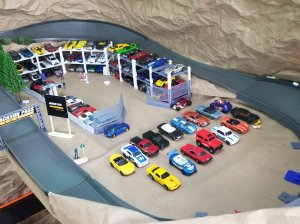
The first section is 2-lane track that runs for appx 20ft. It consists of a custom printed start gate with timer switch, a MaxTraxxx 90, Hot Wheels 180, and 3D printed 45s for the chicane.
The start gate is at 5ft and is currently set to hold 4 cars. The straights are a mix of MaxTraxxx and Hot Wheels black/orange.
Drivers will quickly encounter a MaxTraxxx 90° that exits into a long straight. The curve gives an early lead to the inside car but will slingshot SOME cars on the outside lane--if they hit it right.
The 2-lane straight has a low slope but has a dip that provides a small boost (bigger boost for heavier cars). Inside cars must maintain their lead to stay competitive.
The Hot Wheels dual 180 provides a slingshot advantage to the outside lane. Especially in combination with the chicane. Low cars (i.e. Nightburnerz Chevelle) will scrape the curve when using the inside lane. Cars should be neck and neck exiting the chicane and entering the open track to stay competitive.
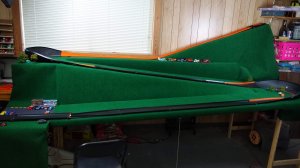
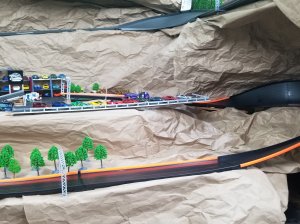
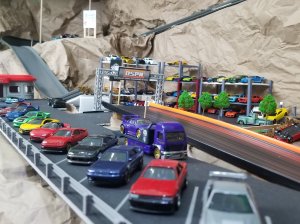
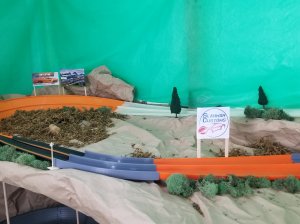
The second section is 2-wide open track using the Crash Racers set. It runs for appx 25ft.
The three curve corner to start the open track portion has a very low slope. Drivers must gather enough speed in the 2-lane section or risk stalling out before reaching the JPS Checkpoint. Each curve has its own personality and will influence the cars differently.
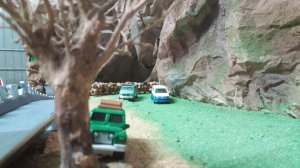
The cavern straight is a little tricky as it isn't completely level. Cars may sway from side to side, especially if they've made contact with the wall exiting the three curve corner. If drivers have made contact, they must regain control and gather enough speed to clear the next curve.
This curve is tricky in that drivers can go too slow OR too fast. Too slow and you don't complete the curve, too fast and you will catch air while going into your descent. If your car isn't straight going down, it won't be straight going up.
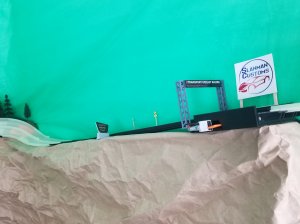
Chaos Canyon jump and checkpoint. It's bigger, it's better, it's out of controller! Don't hit the checkpoint, it happens.
The third section is a 3-wide open track that reduces to 2-wide to finish the track. The 3-wide runs for 10ft and the 2-wide runs for another 10ft. It's a messy part of track so anything can happen here!
Drivers must land the Chaos Canyon jump and quickly get their cars under control to complete the Augmoto curve. Too bouncy of a landing and you're going into a wall and won't reach the TuneTrax checkpoint. This curve creates many passing opportunities with drivers approaching the curve all at different angles.
The reducing straight exiting the Augmoto curve is your last chance to pass (until I change out the last curve). Exit speed and no wall contact on the Augmoto is key for passing.
The final curve doesn't allow for any passing due to the high bank and low entry speed at this point in the track, it will be replaced by another Crash Racers curve that will allow a final pass.