How I built my first Hot Wheels track
After I decided I was going to race Hot Wheels cars, I needed a track. Being limited on time, budget and just not knowing how far things would go, I decided to build a very basic track that is little more than a few boards and hardware from Home Depot.
This guide is intended for those that want to get started with downhill diecast racing. These are the basics and have been improved upon over and over by other racers. For minimal cost and a free weekend, you can have your own Hot Wheels derby track ready to race.
Track goals
My goals for this track were simple. I didn't have space to keep my track up all the time so I needed a track that was easy to setup and strike, and also easy on storage. I also didn't have enough room for a super track so this guide only covers a 15-foot track...however, this design can be expanded upon without much extra effort or cost.
Tools and materials
- (4) 6'x 5.5" x 1" wood planks
- (3) 3" door hinges
- Various wood screws
- Simple saw for cutting
- Screwdriver
- Some sandpaper
- Paint
Construction
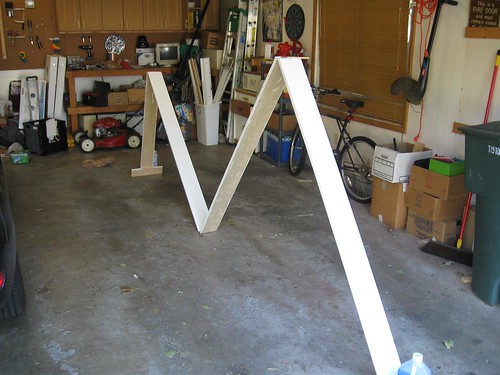
First, take one of the 6' x 5.5' planks and cut it to be 4' long, leaving 2' left over. The 4' board will be the “leg” of your track that creates the support for the hill. I found 4' to be a good length, however if you want a steeeper drop you can try longer measurements.
Next, lay out your planks end to end, leaving about an inch of space between each one with the 4' board at one end.

Next, lay a hinge across each gap making sure the holes in the hinge have plenty of room on the plank itself. If you screw the hole too close to the end of the board it will split. Make sure you alternate sides when attaching the hinges. The end result should be a track that folds up like an accordion.
While the boards are still flat, take the 2' left over piece you cut in the first step and nail it across the bottom of the 4' leg board. Make sure the edges are flush. This cross board adds stability to the back leg when it’s standing up. Without it the hill will wobble and fall over.

Laying track and expansion
Once you have your boards together, sanded and painted as you want, you're ready to lay some track. This track is intended for use with official Hot Wheels orange track, but other brands may work just as well, you'll have to try it out.
One area to pay attention to is the curve going from the hill into the straight, often called the transition. Depending on the downhill angle and the track you're using, this is where you'll see most problems when you start testing with cars. You want the transition track to be as stiff and solid as possible with little give. The more give there is in the track at the curve, the more energy your cars will lose and thus the slower they'll go.
Expanding this track design is easy too...just buy more boards. After the first straightaway board, you really don't need the hinges if you don't want to bother. Just lay extra boards straight in a line and you're set. You could buy four more planks and have a 30-foot track in no time.
Next steps
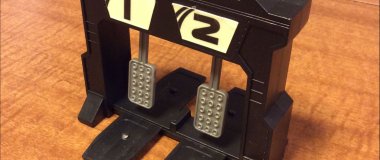
Once you're happy with construction, your track will need a starting line and a finish line. Check out some of these collections for guides and inspiration.
And whatever you do, don't forget to share photos of your track and your build process here at Redline Derby Racing.
Discussion
Welcome to the site, Bill, and thanks for posting...glad to hear you're building a track, hope you can use it to join the racing soon. Can't wait to see your build photos.
As far as the wood thickness, I just use different screws than the ones that come with the hinge. Although your solution of adding wood would certainly do the trick.
For this type of track, the actual orange track does not get attached the track at all. I just glued popsicle sticks to the boards and that did the trick. The orange track fits perfectly over 2 of them, plus then you can remove the track whenever you want.
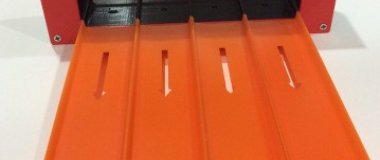
I use the 3DBotMaker starting gate too and I have yet to find a clever way to attach it to my hill. Right now I'm just using a clamp to hold it on. Less than elegant but it works. As for a more permanent solution, I was thinking about using some stoppers on the hill in front of the gate and let gravity do the rest. I may also drill some tiny holes at the back of lanes 1 and 4 and then use some some bungee or clamp or something to firm it up...again, haven't gotten that far yet. As you can see in this article, my starting gate was a DIY lever-style and it worked great. One thing I didn't anticipate (or just was blind to) with the 3DBotMaker gate is that it has to sit on top of the board so the track isn't flat for the first foot or so after the start. The gate is a great accessory but I may look at rebuilding my DIY gate so things can be more flat.
The 3DBotMaker finish line, however, is awesome. I used that just the other night for our Rip-N-Roll tournament and it worked wonderfully. Accurate, light and easy to manage.
- screw another section of plank under your angle section, make it long enough for the starter to sit on it... — model40fan
My first attempt at making my own drag track.
The Marrland Dragstrip

- Looking good! — 72_Chevy_C10
- spiff ! — model40fan
- Very cool, off to a great start — redlinederby
- You should start a new thread and share photos as you build — redlinederby
- Looks good! — GaryB
My track is just about finished.. the final piece(3d bot maker 4 lane starting gate) is on its way. My track is very similar to the one that is posted originally. I took into consideration everything that was suggested and made some minor adjustments. so far i have purchased:
8- white pine boards 6ftx10ft boards.
1-4in hinge
40ft of track (4lanes worth)
1 3d bot start gate
1 3d bot finish gate
1 foam board for easier transition from slope to straight away.
Scrap wood..
1 electric switch box for a catcher.
Pictures to follow soon...
- go n-ness go ! — model40fan
- Damn, that's like 160-feet of track. That's a lot of segments! — redlinederby
hi , I'm from Indonesia. We were in Indonesia making the track from aluminum alloy for the race. length 12 meters, as you can see in the photo.


Funny this came up, I have been searching for aluminum stock to make a track that I would adapt the drag track start and finish to. I wanted to eliminate all the transitions.
- are you running DT with the male tab pointing uphill ? the female end of track sections are narrower, no seam problems here... — model40fan
- if you roll the cars from the finish to the transfer you can hear it click at the seams- WRONG DIRECTION — model40fan
I'm using a 6' piece of 1/8"x6" aluminium, 2Seven...and just running drag track sections up it. The 6' Gives A pretty Nice naturaL curve to the slope and I put a block of foam under the transition area.
You might have a little fun mounting the DT start gate, but you should be able to make it work.
Hopefully this link works..this is a brief link to my track. I have solved the solution to my transition from slope to straightaway. What I forget wad the person that made a metal attachment to connect the track at the angle.


I am in the process of making this type of track.. There are a few things that I was wondering about. The thickness of the boards are not thick enough to support the hinge screws without them piercing the back of the board. I think I can just hammer a piece of small wood to those spots? Also how should I adhere the track to the board? I don't want them to slide all over the boards. I also am concerned with the starting gate that i will be ordering from 3dbotmaker and how i will be able to attach it to the board. I have already purchased the finish gate from 3dbot.
I have been taking pictures of the process and will post when i'm done.
Bill