The Skyway
Details
- Style: Road course
- Total length: 55 ft.
- Lanes: 2
- Built by: TheSkyway
About
The goal with The Skyway was to use the least amount of materials possible. How can the structure of the track, be something aesthically pleasing while also creating a solid support for racing?
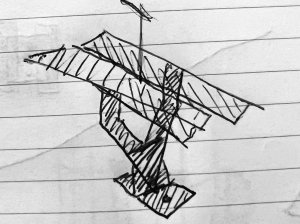
First thing I had to do is come to terms with the fact that I'm not a model maker. I leave that to the pros. But I still wanted there to be something pretty to look at.
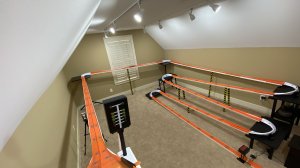
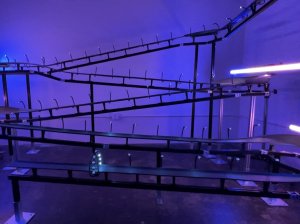
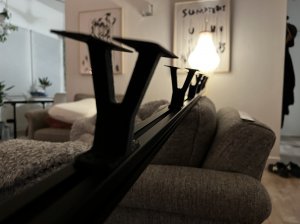
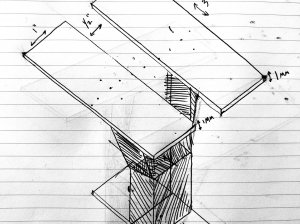
When I first started sketching the track, I knew I wanted a major component to be custom 3D printed. Design after design... it was altogether too much plastic. And one day, I thought of the elevated trains. How they sit above on trusses, in the open air leaving plenty of room for a camera to track the cars, and to keep the viewers focused on the racing.
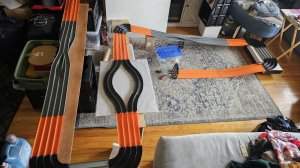
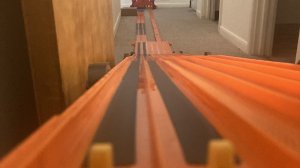
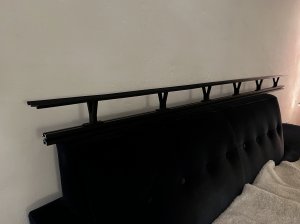
The design was simple. Basically a track joiner on stilts. It will keep the tracks hugged together, and with long connectors, and a "truss" every 12 inches (one for each section of hot wheels track. Two for each section of Crash Racers) it could support the tracks quite well without too much bending. (Have yet to race a 100g car...so we will see.)
All I needed now was the supports for the supports. Something I could screw the trusses into, I entertained ply wood, but the shape of a 2X4 wasn't exactly what I had in mind visuall. And I live in an apartment, I have no access to a wood shop (or wood shop skills) to alter the shape of the wood in any way. So that wasn't an option. It needed to be something I could alter through out the process. Something easy on the eyes.
One day, T-Slot popped up in my research. And I knew I was onto something. It was first just the simple T-Slot one might use for their carpentry table to keep lines and cuts straight. And then the Aluminum extrusion world started to reveal a variety of options.
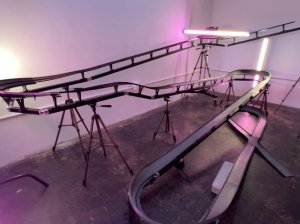
I use a company called Misumi USA. There are many companies, but I found that Misumi had fast shipping times, and could do all the machining necessary (threading each end) in order to start to assemble the track. I used the 30/30 Series extrusion. It's 1 inch all around. And the base of my 3D printed trusses was going to be 1 inch wide. So it would be a perfect fit, and a clean profile.
There are pivot joints that connect each end of the extrusion together, giving me a lot of freedom to adjust the pitch of my track while assembling. The pivot joints are from Framing Technology. They were arguably the most expensive part of the track. But a key component allowing for adjustments, and future tracks being built with this adult erector set.
Tripods were used to work with levels. Once I found a pitch and grade that worked well for my cars, I then replaced the Tripods with single verticle sections of extrusion. It was scary because I was locking in those lengths, but thankfully it all turned out well. This now gave the track a very minimal silhouette. But it meant that the testing phase lasted months.
Each adjustment required the track to be re-calibrated. Every movement on one part, changed just about every other section above and below it.
I hoisted the start gate up to 70" so that the finish line could be a foot off of the ground.
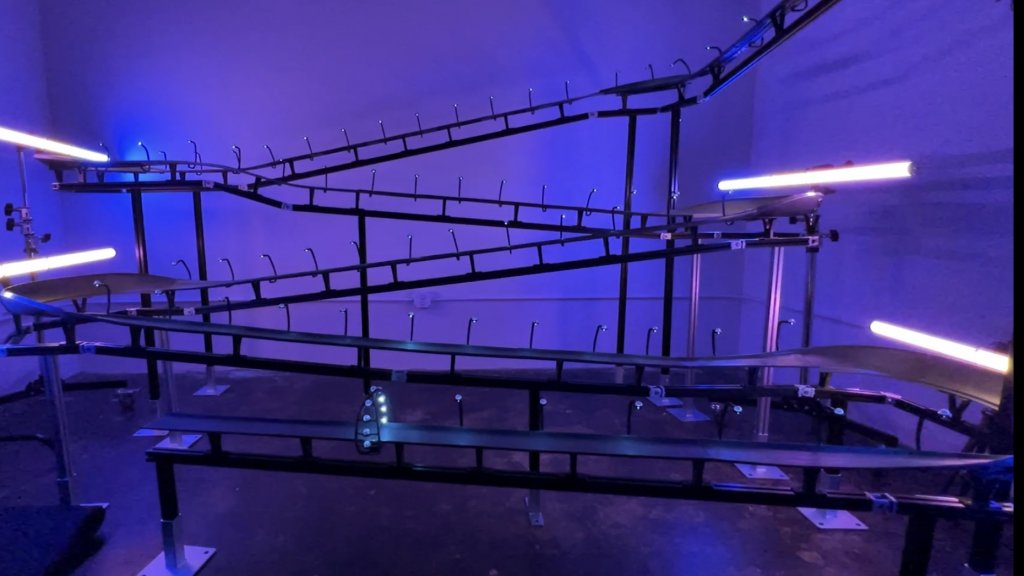
The track was designed specifically to be camera friendly as I knew I was going to be starting a Youtube channel. So there isn't much of a unique layout. It's a standard switchback. However, one thing the extrusion and the pivot joints allowed me to do was to honor the exact degree of the crash racers "180" degree turn. It's more than 180, which gives more of that narrow angle straight away coming out of the turn. This kept the shape feeling unique.
Once the track was built, lighting was next. I have four LED tube lights which is great for fill light and ambience. The lights hover over the turns. This allows the light to bleed onto the straight aways give the track a colorful sheen. But there still needed to be more light on the straight aways to keep the cars in focus.
I love the street light aesthetic, but I'm no electritian, and the whole concept of the track is to be as light, airy, and wireless if possible. So wiring those scaled street lamps wasn't an option for me. (I probably could've and may still investigate this option, but at this point I desperately wanted to finish the track.)
I found battery powered mini LED lights that are meant for party balloons. They are 1/2" in diameter, and the light was just strong enough. Now it was about how to have them hover over the track.
So I simply designed a stand for the light. A curved post that hovers over the center of the track, with a 1/2" diameter ring at the end, and the light simply rests in the ring. I did have to use some "Museum Putty" to stick the lights in place. The vibrations of the cars coming down the track with jostle the lights out of place. At the base of the light post it has a track connector that slides right into the track. The post isn't heavy at all, so it doesn't weight down the track, and keeps the profile still minimal.
In order to really fill the track with enough light, I had to place a light post every 8 inches. Keeps a nice flash on the cars all the way down The Skyway.
The only issue with the Mini LED orbs is they have a small plastic tab you remove in order to turn them on. The tab seperates the batteries inside. So every time I'm done filming, I have to re-insert the plastic tab into the lights to preserve the battery. And with over 80 light orbs. It takes a few minutes... But the orbs are super inexpensive. 20 dollars for 100. And they have different colors.
I worked with a guy, Matt Guse. His company is Guse Industries. He is great CAD artist, and really brough my sketches to life, and even offered structural adjustments, and design suggestions that really brought all these 3D printed pieces together in a similar style. He does all the printing as well.
Here's his website. Highly recommend him.
Tell him Sonny sent you. www.guseindustries.com
If you got this far, thanks for reading :) Find me on Facebook @ Sonny Valicenti
And find my channel on youtube @ The Skyway.